• XonTel Platform
    • XonTel PBX Manager
      • PBX V 1.X.X
        • Overview
          • Installation
            • PBX ISO Installation on ESXi
          • License Activation & Verification
          • Log in to the PBX
        • System
          • Authentication
            • Users
            • Groups
            • Permissions
          • Network
            • Network Interface
            • Network Routes
            • Network Host
            • Static Routes
            • Diagnostic Tools
          • Host Name
          • Email
          • Security
            • IP Tables
            • Fail2ban
          • Dynamic DNS
          • VPN
            • Open VPN
            • SSTP
          • Maintenance
          • LDAP
        • PBX
          • Extensions
          • Trunks
          • Call controls
            • Inbound Routes
            • Outbound Routes
            • Time Conditions
            • Auto CLIP
          • Call Features
            • IVR
            • Ring Group
            • Queue
            • Paging/Intercom
            • Blacklist
          • Voice Prompts
          • Music On Hold
          • NAT
          • Status
          • CDR
          • Feature Code
          • Recording Storage
          • Transport
        • Event Center
          • Session Timeout
          • Activity Log
      • PBX V 3.X.X
        • Overview
          • Installation
            • PBX ISO Installation on ESXi
          • First Login and Activation Steps
        • Features
          • Dashboard
          • Extensions
          • Trunks
          • PBX Features
            • Call Features
              • IVR
              • Ring Group
              • Paging/Intercom
              • Blacklist
            • Call controls
              • Inbound Routes
              • Outbound Routes
              • Time Conditions
              • Auto CLIP
            • Feature Code
          • Voice & Audio
            • Voice Prompts
            • Music On Hold
            • System Sound Language
          • Queues
          • CDRs
          • SIP Settings
            • NAT
            • Transport
          • System
            • Network
              • Network Interface
              • Network Routes
              • Network Host
              • Static Routes
              • Diagnostic Tools
            • VPN
              • Open VPN
              • SSTP
            • Dynamic DNS
            • SMTP Settings
            • Host Name
            • LDAP
            • Session Timeout
            • Storage
          • Security
            • Firewall
            • Fail2ban
          • Maintenance
            • Service Actions
            • Backup & Restore
          • Advanced Settings
          • Status
          • Audit Log
          • Authentication
            • Users
            • Groups
            • Permissions
    • كول سنتر زونتل
      • Call Center V 1.X.X
        • Overview
          • Installation
          • Log in to the call center
          • License Activation & Verification
        • Dashboard
          • Agent Insights
          • Inbound calls
          • Outbound calls
          • My Dashboard
        • Call Center Management
          • Missed Call Actions
            • Missed Calls Actions History
            • Missed Call Actions
            • Missed Calls Actions Logs
          • Type of Break
          • Widgets
          • CDRs
          • CDR Survey Questions
          • Queues
          • Queue Logs
          • Queues Evaluation
          • Trunk
          • External Lookup
        • Contacts Management
          • Contacts
          • Contact Groups
          • Companies
          • Contact Custom fields
          • Customer Journey
        • Authentication
          • Users
            • Admin
            • Supervisor
            • Agent
          • Groups
          • Permissions
          • Add End User
        • Applications
          • Ticket Managements
            • Categories
              • Sub Categories
            • Create Ticket
            • Tickets List
            • Reminder Settings
            • Dashboards
            • Ticket Statistics
            • Tickets CCs
            • Follow Up
            • Custom Fields
            • Notifications Templates
            • Ticket Logs
          • SMS
            • SMS Message
            • Bulk SMS
            • SMS Templates
          • Email Management
            • Outgoing Emails
            • Incoming Emails
            • Attachments
            • Templates
            • Teams
          • Auto Dialer
            • Dial Teams
            • Auto Dialer Log
            • Auto Dialer Status
          • Web Chat
            • Dashboard
            • Offline Messages
            • Web Chat Logs
          • Queue Evaluation
            • Queues Evaluation Level
            • Queues Evaluation
          • Social Media
            • Social Media Teams
            • Social Media Sessions Tracker
            • WhatsApp
          • Agent Chat
        • Reports
          • Generate Reports
        • Settings
          • Site Administration
          • Email Settings
          • Email Channel Mailbox
          • Email Channel Outbox
          • Email Logger
          • Web Chat Settings
          • SMS Gateway
          • ODBC Settings
          • System Parameters
          • Updates
          • Https Certification
          • Web Phone Configuration
          • Web Logo Settings
          • End User Logo
        • Block
          • Blocked Word
          • Block Settings
        • Status
        • Session Control
        • Activity Log
      • Call Center V 2.X.X
    • Versions & Releases
      • V 1.X.X
      • V 2.X.X
      • V 3.X.X
        • V 3.0.X
        • V 3.1.X
        • V 3.2.X
        • V 3.3.X

Log in to the call center

165 views 0

Written by xontel_admin
يونيو 20, 2025

🌐 Login Portal Overview

This is the main gateway for accessing your organization’s PBX Admin system and مع كول سنتر زونتل environment. It offers a clear, user-friendly starting point for different user roles to securely reach the tools they need.

Step 1:
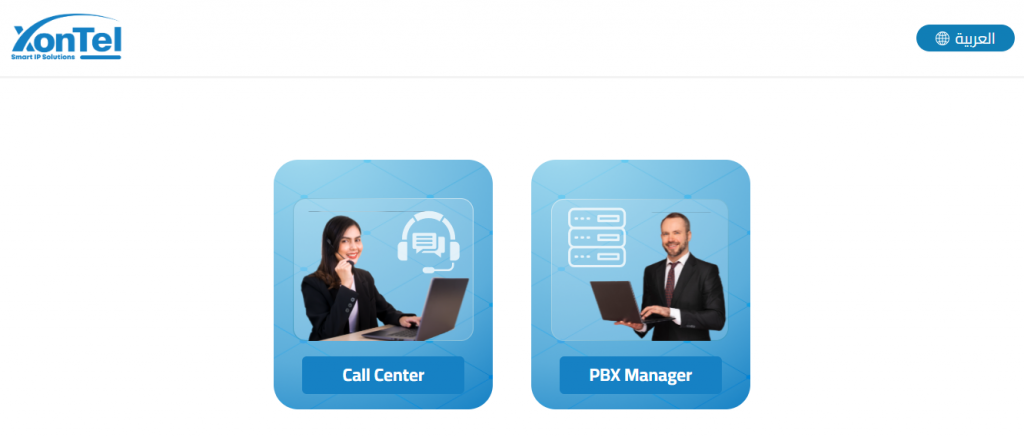
Click مع كول سنتر زونتل to move to the Call Center login page

Step 2:
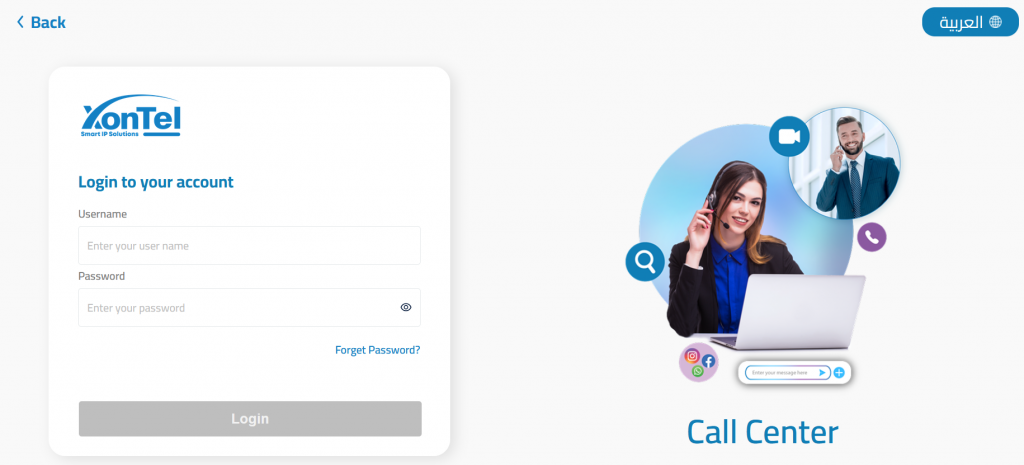
Enter your Username and Password in the provided fields.

Step 3:

Click the Login button to enter the Call Center Agent interface. From here, you can handle calls, view tickets, and communicate with customers efficiently.

🌍 Language Option

A convenient language switcher is available at the top right, allowing you to choose English or another supported language for a comfortable user experience.

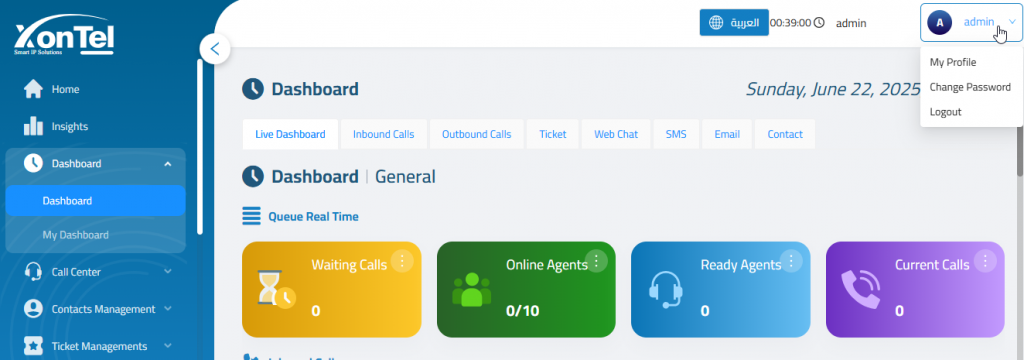
👤 User Menu Overview

The User Menu is your personal control panel. From here, you can manage your profile, change your password, or securely log out of the system.

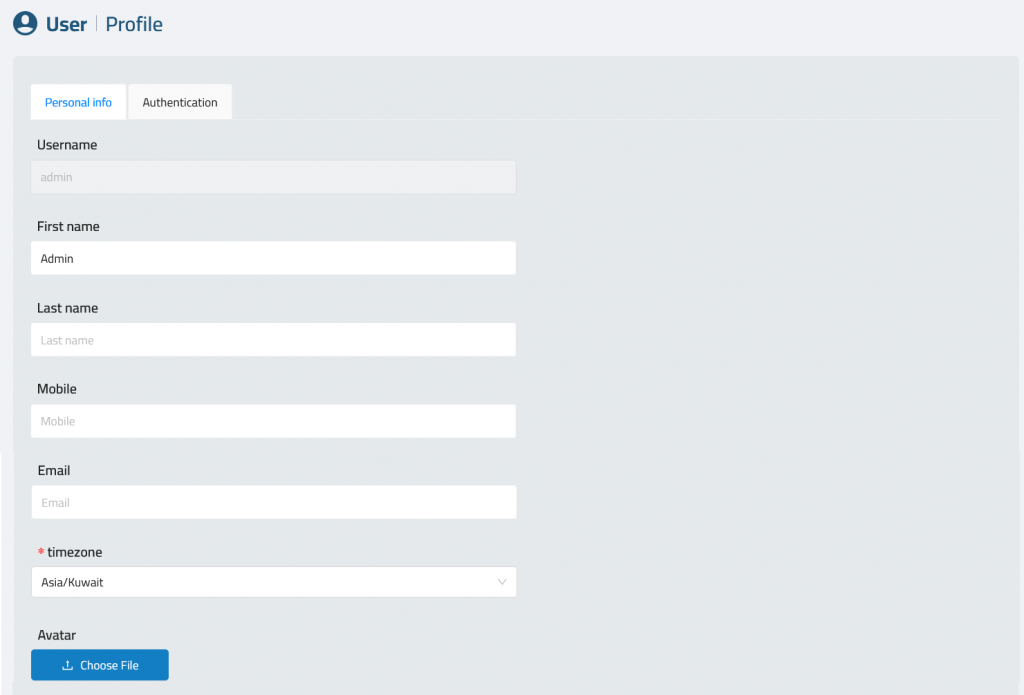
📝 Editing Your Profile

Personal info

Inside Personal Info, you can update the following fields:

  • User Name – This is fixed and cannot be changed (usually set by your system admin).
  • First Name – Optional.
  • Last Name – Optional.
  • Mobile – Optional contact number.
  • Email: Add your Email.
  • Timezone: Select your timezone.
  • Upload or change your Avatar image by clicking Choose File.

Authentication
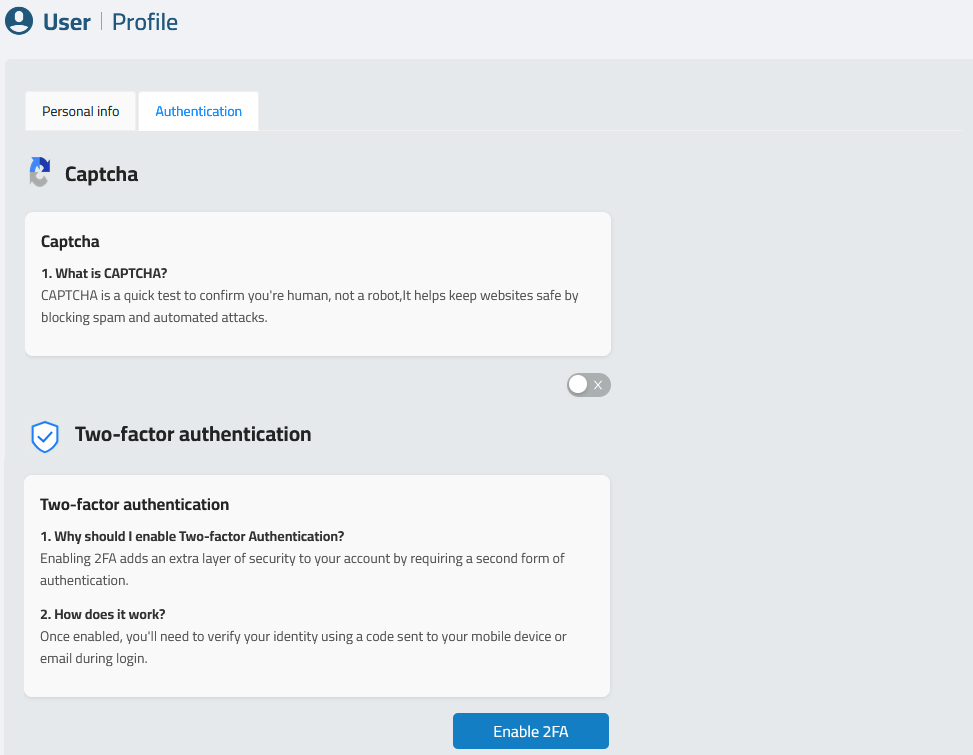
Each user can enhance their account security directly from their profile:

✅ CAPTCHA
  • Prevents automated bots from attempting unauthorized access.
  • Toggle the switch to activate CAPTCHA for login.

During login:
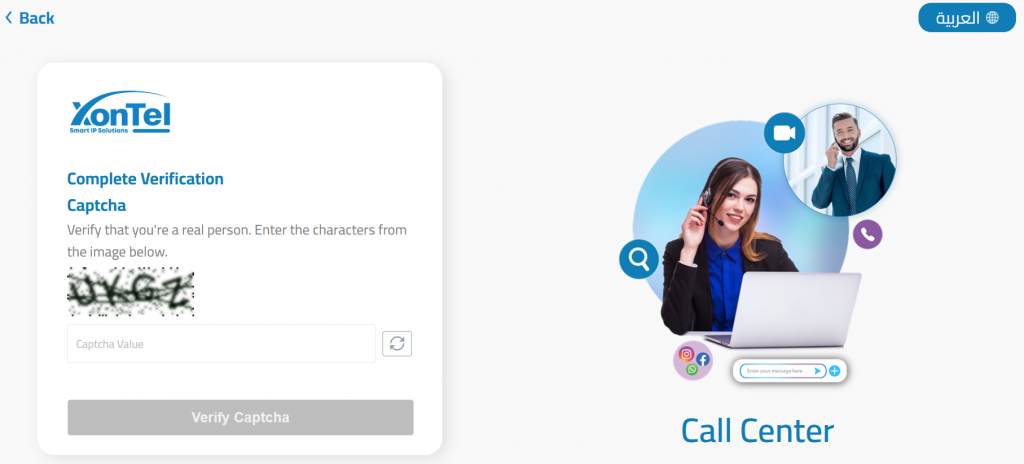
After entering your username and password, complete the CAPTCHA verification to confirm you are a valid user. Enter the characters exactly as shown in the image and click “Verify Captcha”.

✅ Two-Factor Authentication (2FA)
  • Adds an extra layer of protection by requiring a second verification step.
  • Click Enable 2FA to start setup using an authenticator app.
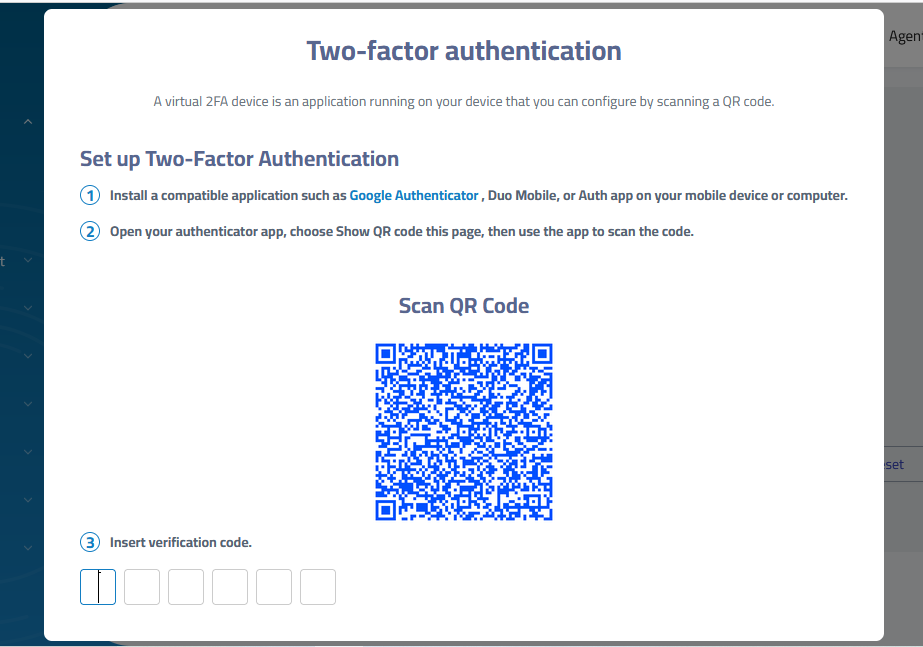
During login:
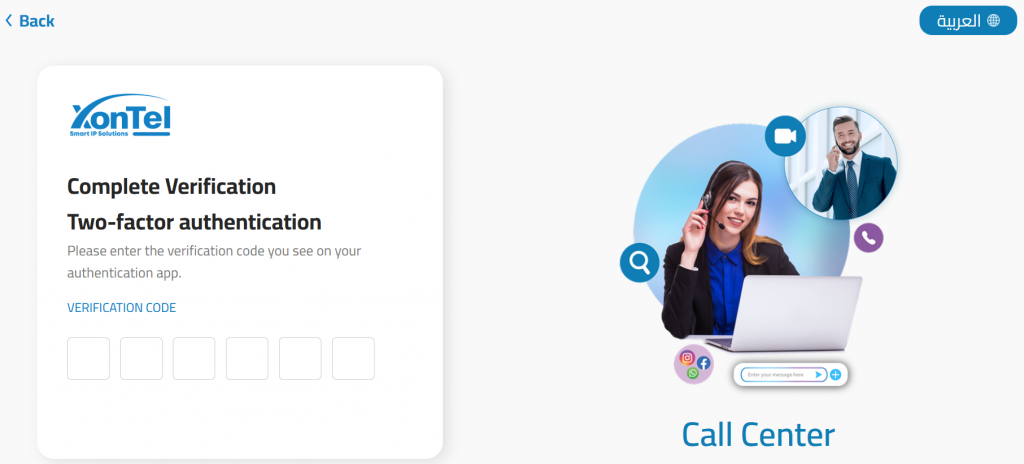
After entering your username and password, complete the CAPTCHA verification. If CAPTCHA is enabled (by user or admin), users are prompted to enter a 6-digit verification code from their authentication app (e.g., Google Authenticator or Microsoft Authenticator).

Note: Admins may enforce 2FA or CAPTCHA for specific roles from the admin panel.

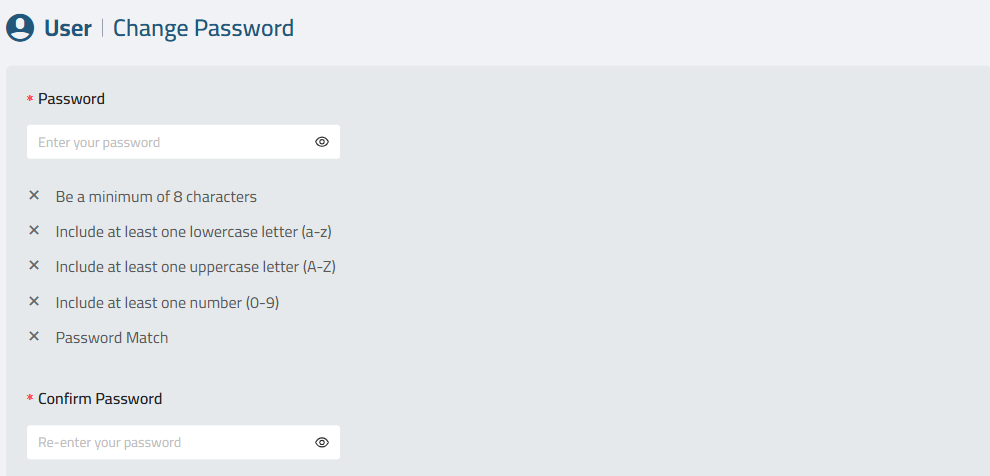
🔐 Changing Password

To keep your account secure, follow the password policy when creating a new password:

  • Enter your New Password, ensuring it meets the security requirements:
    • Minimum of 8 characters.
    • At least one lowercase letter.
    • At least one uppercase letter.
    • At least one number.
    • The new password and confirmation must match.
  • Confirm the new password in the Confirm Password field.
  • Submit the change.

🔐 Forget Password

Forgetting a password can happen to anyone. To ensure minimal disruption, XonTel’s Call Center platform provides a secure and straightforward password reset process.

Step 1: Navigate to the “Forget Password” Page
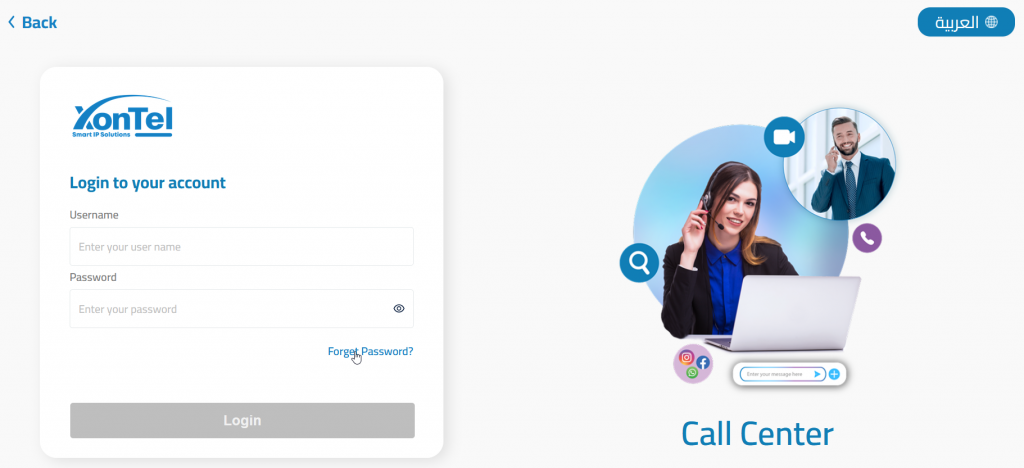
  • On the login screen, click the “Forget Password?” link.
  • You will be redirected to the Forget Password (Call Center) page.
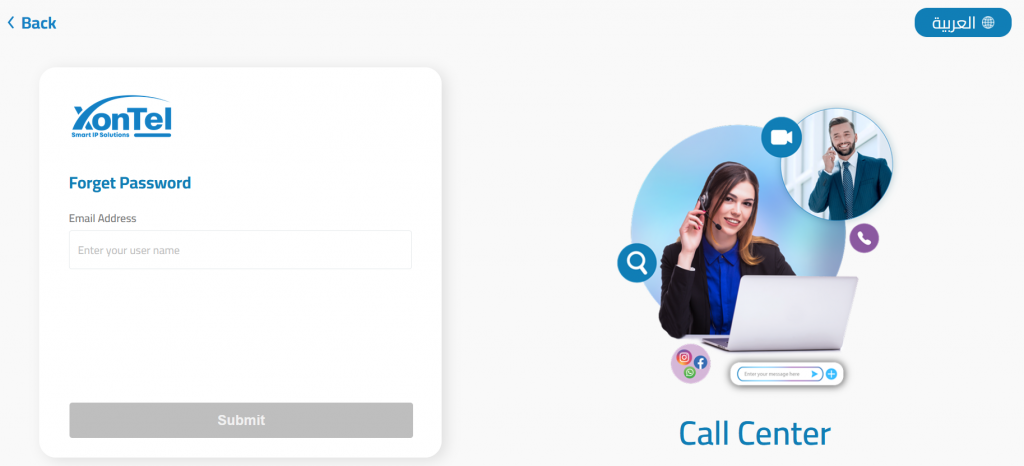
  • Enter your registered email address in the input field.
  • Click the “Submit” button.

Step 2: Check Your Email
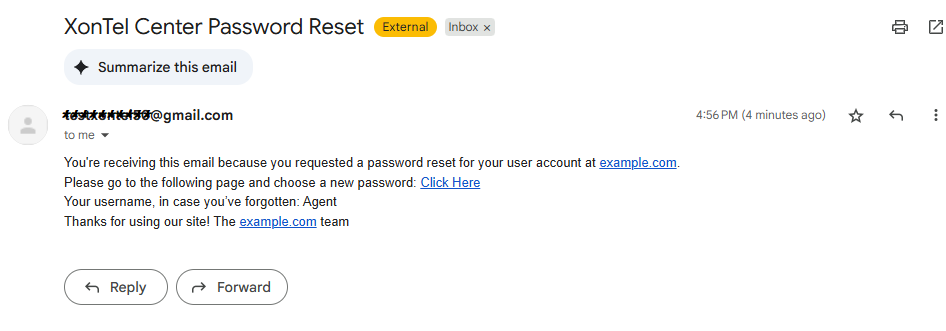
  • You will receive an email titled “XonTel Center Password Reset” from the system.
  • The email includes:
    • A password reset link (Click Here)
    • Your username (in case you forgot it)

Note: If the email doesn’t appear in your inbox, check your spam/junk folder.

Step 3: Set a New Password

Click the reset link from the email. You will be redirected to the Confirm Password page.
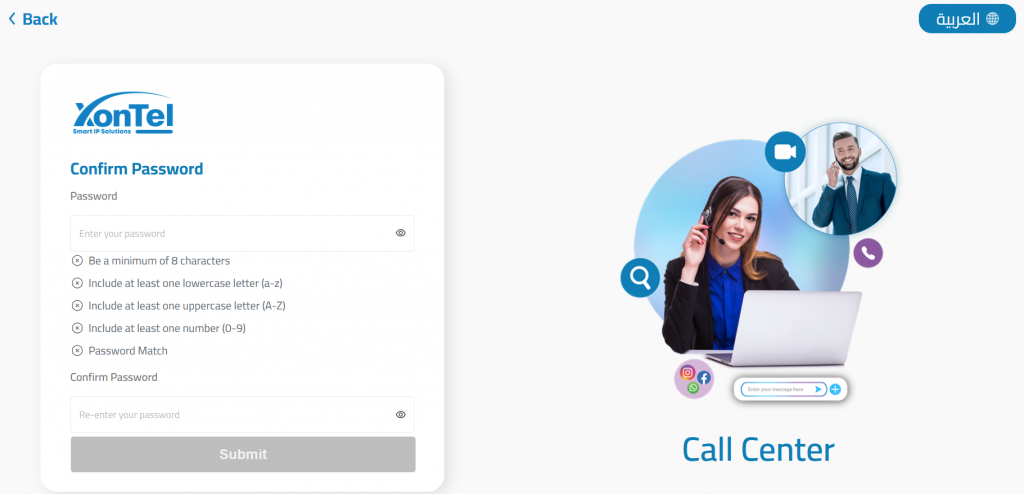
  • Enter a new secure password that meets all the following requirements:
    • Minimum of 8 characters
    • At least one lowercase letter (a–z)
    • At least one uppercase letter (A–Z)
    • At least one number (0–9)
  • Re-enter the new password in the Confirm Password field.
  • Click Submit.

Was this helpful?

Yes  No

Didn't find your answer? تواصل معنا

Previously
Installation
Up Next
License Activation & Verification
  • Copyright 2026 SmartWpThemes.com. All Rights Reserved